Tech tip: Image headers in Word for a professional look

Entry posted by Matt Leverich
76,802 views
I would estimate that close to 100% of superintendents have and use Microsoft Word for creating various documents for use around your clubs, and personally as well. While there are limitations to the software, one thing that works great is how it handles headers. There is a little bit of process to it, but in the end you can have a very nicely designed document that you can then edit on your own.
Let's say that you have had TurfNet design a header for your blog and you'd like to use it on some documents as well. Or you had someone design a custom look for you. As part of my career services we create a custom header for resumes anyways and we include it in the Word file for the base cover letter in this manner. Yet another option would be that you want to have your club logo with your name in large text at the top of any notes to the membership on course conditions, articles, green speed, etc. These are all easily set up as headers in Word.
I've created a stock header image for myself to use as an example in this tutorial. Here's how it works:
1. Hire someone or find a designer friend to create a professional header image. This will allow you to have the best look that reflects your professional career properly. The image can be various sizes, but if you want it to be really easy, have them set up the image as an 8.5 x 11 file in jpg or png file types, at a minimum of 150 dpi.

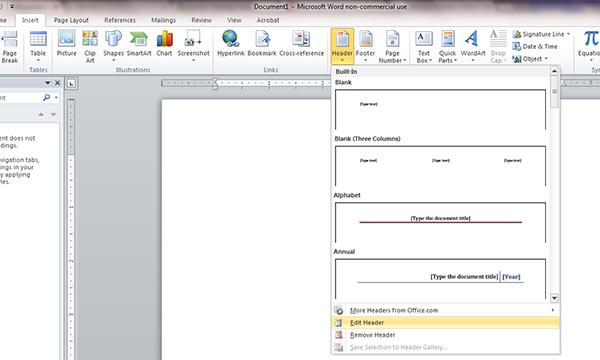
2. In Word, click on the Insert tab and select the Header section. Then select Edit Header.
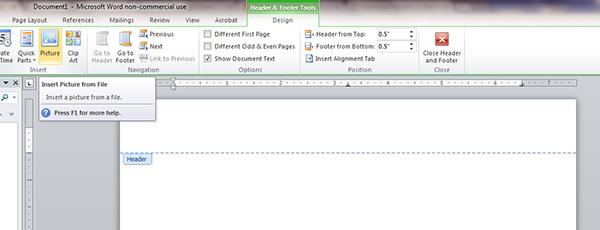
3. Select the Picture section in the new set of sections available at the top. This will open a dialog box for you to find the file you want to include. Navigate to where the header image is located on your computer or drive.
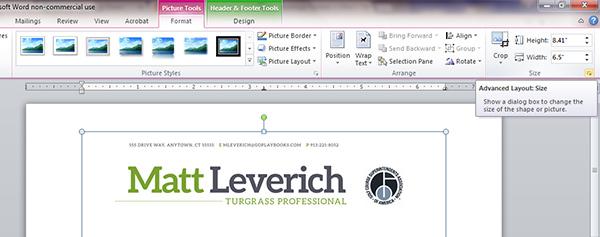
4. Once the picture is inserted, it must be sized properly. Click on the very bottom right of the top sections where there is a small arrow in the Size box.
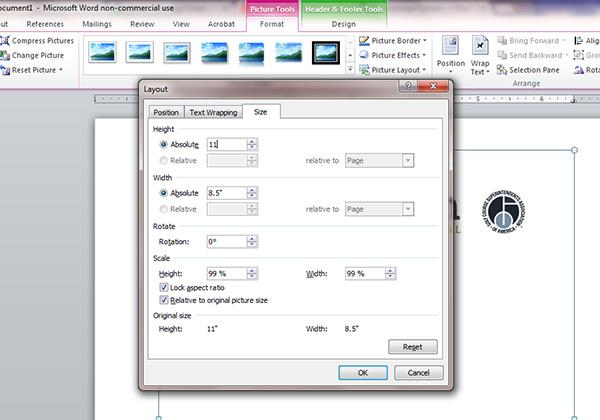
5. In the Size tab, click on Absolute and enter 11 for the height and 8.5 for the width.
6. Click on the Text Wrapping tab and select the box for Behind Text.
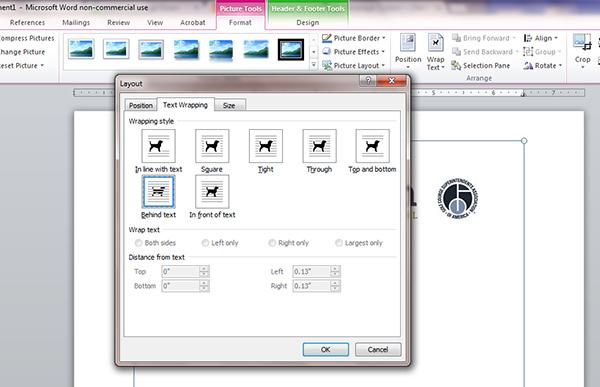
7. Click on the Position tab and select Alignment: Left and related to: Page from the drop down menus in the Horizontal section. Do the same for the Vertical options as well. Exit from this dialog box.

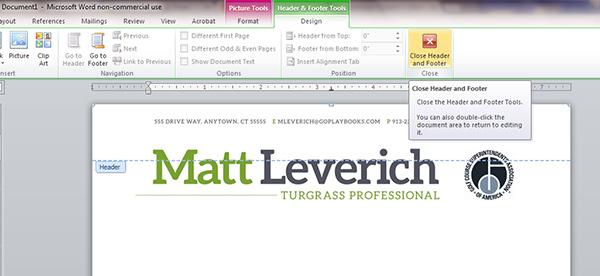
8. The head has now been sized properly. Click on the Design tab at the very top right of the menu list. Then select the Close Header and Footer option.
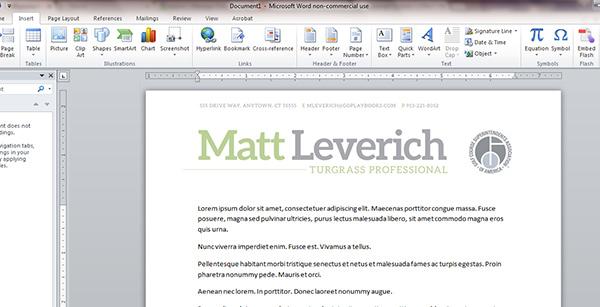
9. Now you can adjust the margins for the text areas. In my example I have lined up the text with the edges of the header layout for a unified look. You can alter the margins by moving your arrow over the rulers on the top and left of the document where the gray and white meet.
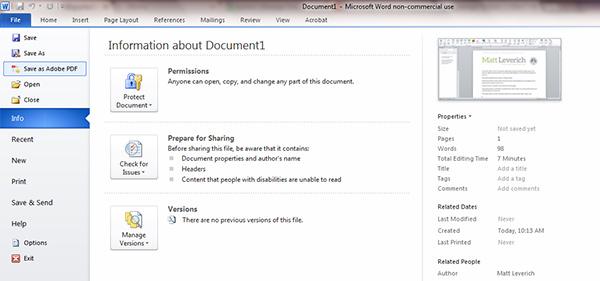
10. Save out the file. As you can see in my example, the header image shows up as faded out or semi-transparent. This is how Word handles it. The header will display properly (not faded out) when you export the file to a PDF. I covered the importance of exporting to PDF in my last blog.
That's it. You now have a professional look for any document you wish to create.
1 Comment
Recommended Comments